BONUS CONTENT: Art Process “Snow Job” #1 cover, Pt 5
In the previous step, the grunt work of the coloring was finished. Everything had been colored and shaded to a point that I was happy with.Usually at this point in the coloring process, it gets a bit more fun and experimental as I play with effects and tints (if the page calls for them).
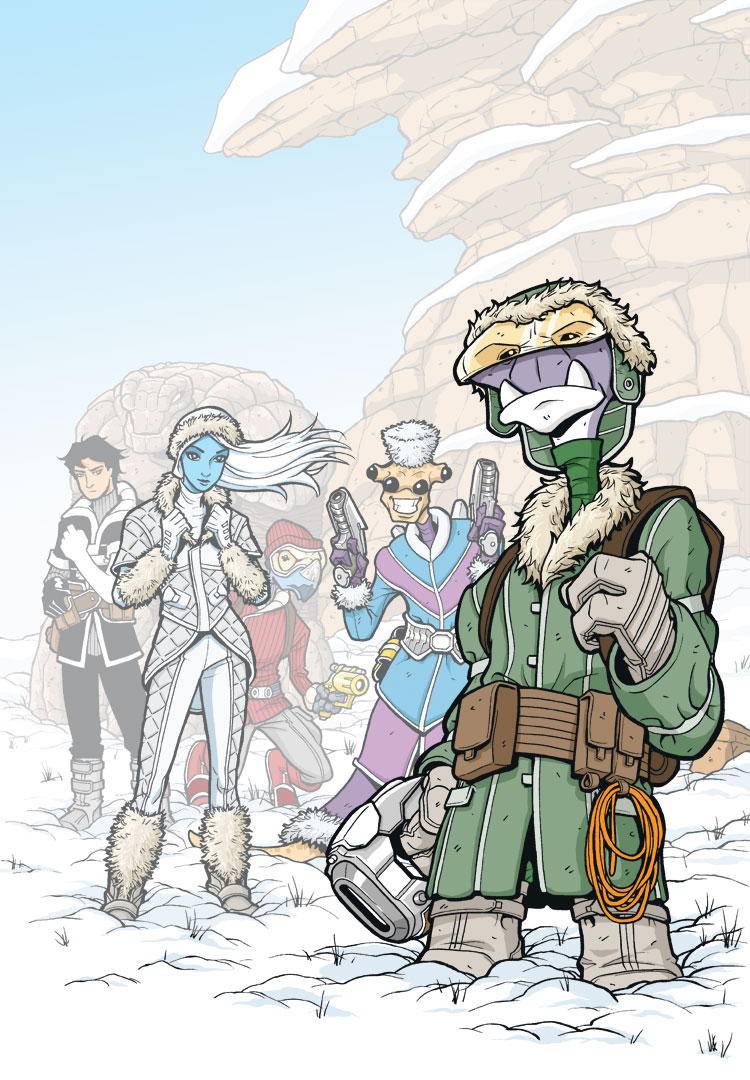
In this case, I always intended for this image to be very atmospheric, with the characters gradually disappearing into the haze of the snow planet as they receded into the distance. I accomplished this by creating several “mist” Layers in Photoshop. Each layer was pure white and had certain elements cut out of it, and I then played with the opacities of the different layers to get the effect I wanted.
In total, I had 3 mist layers going here. The first layer was very light in opacity and covered everything except Roka and the immediate foreground snow that he’s standing on. That way, he’d stand out the most and everything else would get pushed back, visually, to varying degrees. The second layer of mist was behind Sky and Cember, pushing everything behind them back a bit further. Finally, the third mist layer was behind Bocce and Ril. This last layer pushes Bennesaud and the rock wall deep into the background.
I have to admit that sometimes it’s weird to do that sort of thing to your artwork. You think, “Aww, I put all that effort into drawing and coloring Bennesaud and the rock wall, and now you can barely even see them.” But the end result is worth it, I think.
Next up, special effects…


Discussion ¬